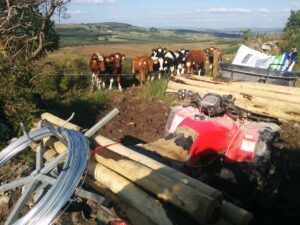
I recently carried some Honda ATV repair I have some experience with working with motorcycles and quads over the years anyway but even without this experience they are easy enough to work on anyway. As I was doing this I thought why not write about my little project and it might help someone else out there thinking about doing the same job.
I thought about buying a newer on from Done Deal or a local quad bike shop but thought it would be worth very little to trade it in in the condition that it was in so I went for my own repair job instead.
My quad was sitting idle with well over a year partly due to me not making the time to getting around to fixing it but mainly due to the fact that I had only one Key and I lost it. Telling myself that it would turn up somewhere but it didn’t so recently after an inspection from the department and having to do some fencing repairs. Then I had to carry fence posts by hand across a km of mountain and bog brought it into focus that I need to fix that quad.
The Repairs

The fact that I had barely parked under a shed roof where the rain could blow in on top of it did not help matters. The exposure to the weather and the fact that it had not been started or used in so long has added more problems that did not exist when I had parked it up.
I quickly realized this when I pulled it out to think about starting it up the tyres were flat the brakes were seized the choke cable had rusted and seized and then broke. When I attempted to free it out and that’s even before I attempted to start work on it.
After I pulled it to a cleaner dryer shed and pumped the tyres the first job was to change the key switch. I was thinking of hot wiring it but knowing how easy it can be to damage electronic parts I decided against this. An original Honda key switch was around 80 euros but I picked up on amazon for a fraction of that price. It might not be an original part but its probably a very good copy and worked just fine.
Honda Key switch

 (
( click image for price)
Even though it was not even for the exact model a trx 350 it looked the same as the one I took off and indeed fitted just perfect when I got it. I took off the front rack and fender to make it a bit easier to change it although I probably could have managed but it was not a big job to remove a few plugs and screws for easy access to the key switch and plug.
Quad Battery
My next problem was the dead battery so after trying to charge the battery I found it would only charge to around 66% and not enough to start the quad. I wouldn’t mind but the battery had been new enough before the quad was parked up and I lost the key.
It was not the first time I had ruined a battery by letting it idle for too long and a fault in all the lead acid batteries. It did put me thinking about other possibilities and after a little search online sure enough I found lithium batteries for motorbikes and ATV s.
Lithium batteries had really made a big impact to cordless tools e bikes phones and everything else they have been installed in over the years. The fact that I could get one for my Honda ATV repair was a bit exciting especially with the fact they claim that they will last so much longer than older lead batteries and also hold their charge a lot better so won’t discharge and go faulty over the winter or when not in use like the older battery.
The downside of course is the price they are almost twice the price of the older lead battery but they are supposed to last a lot longer weigh a lot less and be better for the environment. I think what swung it for me is the fact if the quad was parked up or not in use for a long period of time the battery would still be good and start the bike when I needed it to.
Lithium battery ELECTHIUM YTX14-BS

 click image for price)
The next issue when I tried to jump start it before getting the new lithium battery was their was a loud knock coming from under the seat and the engine did not turn over. I traced this down to the starter solenoid just the battery and from another quick search on the internet concluded that this was the most likely cause that the engine was not turning over. I found a replacement part cheap on Amazon. 
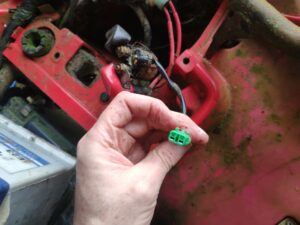
I took some photos of the connection plug on the wiring to be sure it was the right part and it would fit. Apparently the starter solenoids do give up from time to time and I’m sure having the quad parked up for so long exposed to the weather did not do the electrical components any favours. The solenoid was very simple to change just two wires positive and negative held on by 10mm nuts and a plug to the wiring loom.
Starter Solenoid Relay

 click image for price)
After that there was the choke cable that was rusted and broken. Again I brought a new one through Amazon and although this was a little more tricky to change it was not that difficult of a job either. I found this video on YouTube that explains the process fairly well .
I just took off the side panel and while I already had the front fender off while replacing the key switch I just pulled the old cable out and fed the new choke cable through the same way. Unfortunately the plunger at the bottom of the cable inside of the carburettor was stuck which is more common than you might think especially if the quad has been parked up with a while. 
In attempting to pull it out by force I damaged the plunger further and ended up having to by a new one on eBay. Although it came from china the delivery was only around 2 weeks and it worked out a lot cheaper than buying it locally. When pulling out the plunger I would suggest to work with care if its not coming out easy.
Carburettor Plunger Choke Starter Valve Kit

 click image for price)
Use a hairdryer to heat the carburettor and wd40 around the plunger. Otherwise, if you use brute force like I did you will end up having to buy a new plunger kit and taking the carburettor of the quad to replace the old one.
Finally, the seat was worn and torn and while I could have got a cover and tried to cover it myself I felt to save time and risking doing a botch job it would be worth it just to buy a new replacement seat. The Honda trx also known as Honda ranchers in the states are great reliable work quads and parts are cheap enough for them too.
There are plenty videos on YouTube with details of how to work on them and this is not the first time I brought parts on eBay or amazon for this bike. If you are looking for something more to follow than a YouTube video and would like to service or fix your own quad then a workshop manual would always be a good point of reference. If you have any questions about anything I did during this project ask away in the comment section below.
I am glad to have it running again and the whole project was under 200 euros and worth it to have something to carry me around the hill again. If your thinking of buying a quad I wrote another bit on farm quad bikes here


2 thoughts on “Honda ATV Repair”
That is an excellent walkthrough of how you repaired your quad.
I would normally be too afraid of making a mess, but as you have explained it so well, I think that I would have the confidence now to have a go.
Its great that you have given links to the various parts as it means I don’t have to go hunting for them, which is another thing that would have put me off.
Thanks for taking the time to write this.
No problem it gave me something to write about that might help others that want to have a go at fixing there own quad or ATV . There are lots of videos on youtube now anyway for most jobs. If you are planning on servicing your own I would recommend buying a workshop manual like the one I linked to as it covers most regular jobs.